I’ve Bean Busy

Sorry. I couldn’t resist. I can’t believe it’s been so long since I’ve posted anything, but I really have been busy. Spring has hit and with it all the to-dos that have to be done. Add to that a nice trip to the Oregon coast…

Oregon Coast

…and I’ve had plenty to write about but not as much time (or energy!) to do it.

Yesterday and today I’ve been planting beans in the garden. Someone remarked they thought I was a little early but I’ve always planted now or even earlier and never had a problem with the beans not growing.

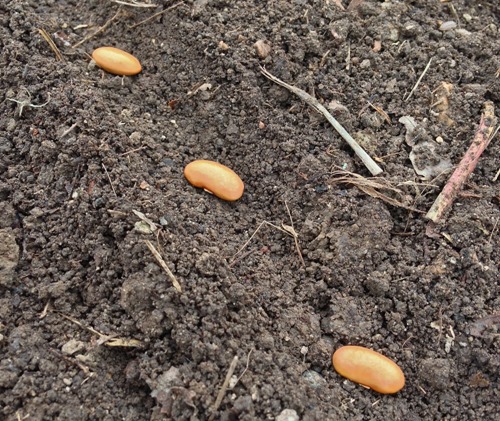
Ireland Creek Annie

One of the plantings I did was a “rescue” of some Ireland Creek Annie beans I grew a few years ago. Or, I should say, I tried to grow. It was a terrible year for Mexican bean beetles and I ended up with literally only a couple dozen beans from my entire crop of this variety and the others didn’t fare much better. Today I planted them all out in the hope of increasing my supply. I’m pretty confident that if the beetles don’t get them this year I’ll have plenty again.

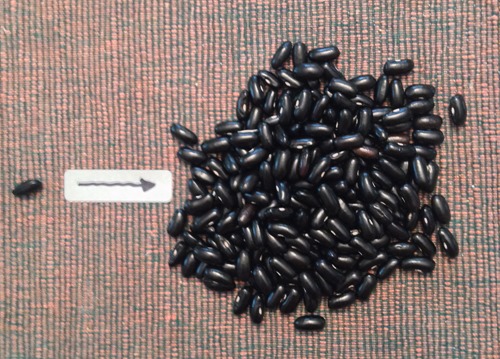
Cherokee Trail of Tears

You see, I speak from experience. Above is the pile of beans I grew from a single seed of Cherokee Trail of Tears that we obtained. (Sorry it’s so blurry. I haven’t gotten any better at photography during my hiatus.) I’ve planted a few dozen of these this year on poles and expect a good amount from this heirloom pole variety. We had some for dinner last night and they were pretty good.

Beans

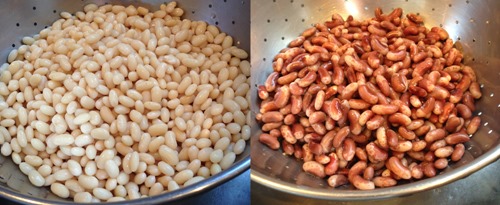
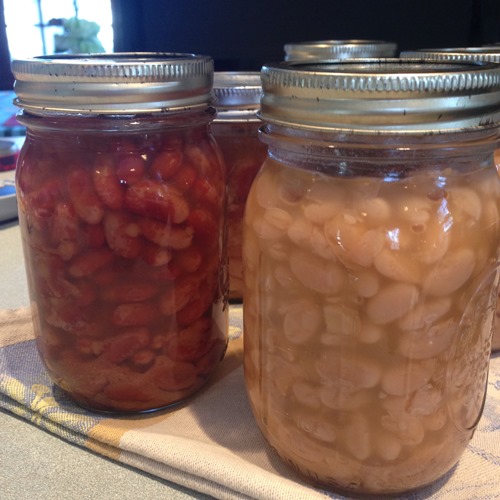
A few months ago I finally got around to trying something I’ve wanted to do for some time. I made and canned some baked beans. I did two small batches at the same time, Great Northern (left) and Jacob’s Cattle (right.)

Sorghum

For the sauce I used sorghum syrup instead of molasses. I’ve made baked beans with molasses before and just didn’t care for the flavor. The sorghum ended up tasting much better.

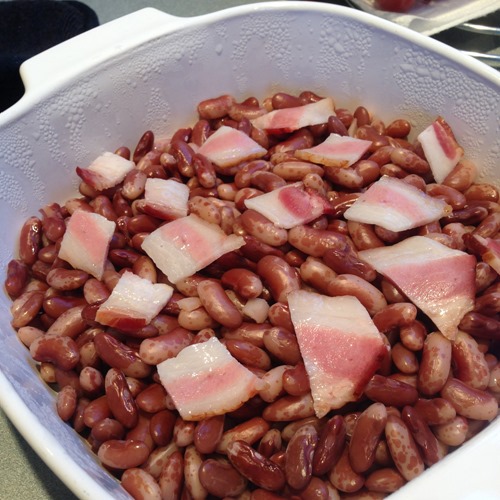
Bacon

Throw in some bacon with the beans, add the sauce and bake. Both batches ended up needing much less time than anticipated to cook. I’ve found this is the case with home-grown beans. Must be because they are so fresh.

Canner

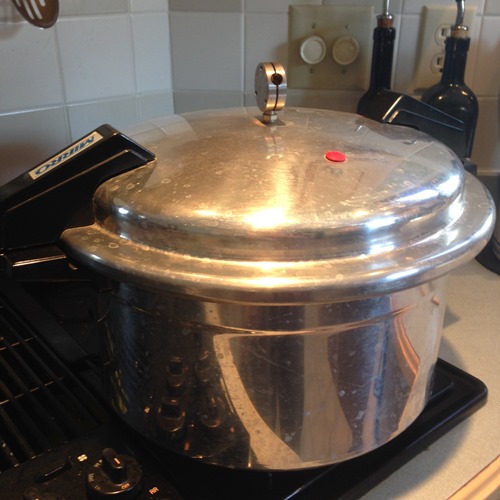
Here’s the pressure canner I got through Craigslist. I only had to replace the gasket and it was as good as new.

Jars of Beans

Voila! Baked beans. I thought the sauce was a bit watery when they went in the oven and then into the jars but after canning it thickened up to a nice creaminess. We go through quite a few cans of baked beans in a year. But I’m thinking now between my mad gardening skills and a functioning pressure canner we won’t be buying cases at Costco, much as we love beans!


Blowing Hot Air

I used my most recent birthday as an excuse to purchase a food dehydrator. I’d been trolling the thrift stores and resale shops on the advice of one of my fellow community gardeners but just wasn’t finding any there. So I decided to just go ahead and get a new one. I actually only had a vague idea of what I would use one for, but figured I would find more over time.

Dehydrator

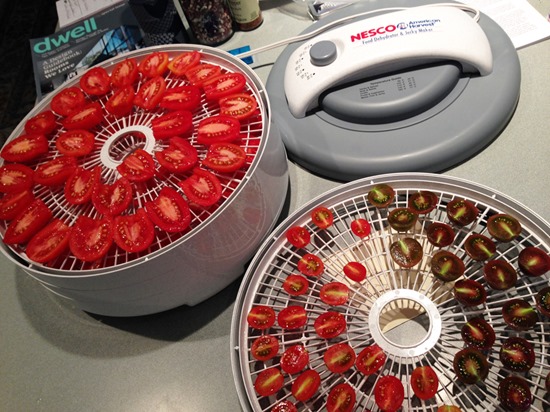
In the past I’ve enjoyed oven-drying San Marzano tomatoes with a little olive oil and herbs which I then freeze and enjoy on pizzas through the winter. Tomatoes seemed an obvious choice for trying out my new toy so I sliced up all different kinds and put them on the trays. The cherry tomatoes I dried to just a leathery stage and they’re like tomato candy. I dried the paste tomatoes longer to try something I’d read about on the good old Internet.

Tomato Powder

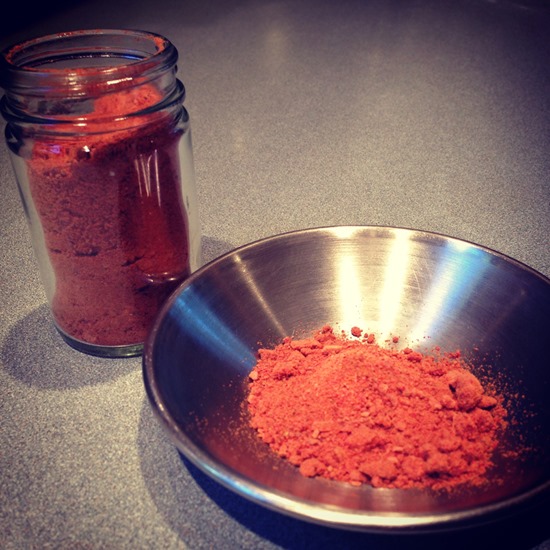
Tomato powder! This stuff makes perfect sense. Imagine being able to add concentrated tomato flavor to different dishes and you’ll understand my excitement. I’ve already used it in chili and tomato soup for a flavor boost and a fellow gardener has told me she uses it in salad dressings. I just dried seeded tomatoes until they were crispy then ground them up in the coffee mill we use for spices.

I did another dehydrating session with random vegetables I thought might be good in soup like turnips, carrots and celery. I also dehydrated a couple pounds of tomatillos thinking I’d eventually use them to make a sauce or chili. Once dried they only weighed two ounces and took up considerably less space. Also, for fun I dried a sliced apple. We gobbled that up immediately. I should probably make more of those for us to snack on at work.

So far I’m happy with my little dehydrator and I’m looking forward to finding more things to dry that we’d actually find useful. I’d like to hear your suggestions if you’re an experienced food dryer.

Salsa!

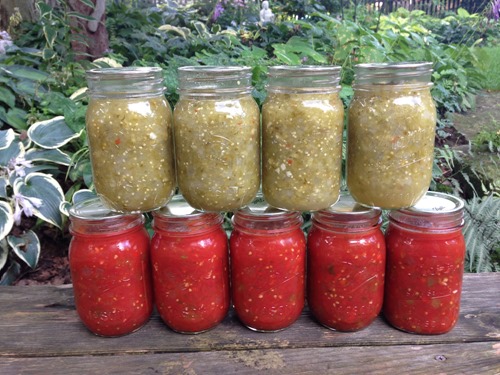
Yesterday I decided to make a couple batches of salsa for canning. Never mind the fact that it was hot and humid and that I had just spent the last few hours at a baby shower. The red velvet cupcake was delicious, by the way. No, I had so many ripe tomatoes on the counter and one shelf of the refrigerator devoted to a huge bag of tomatillos so something had to be done.

The Co-Conspirator had put in a request for a tomato salsa after my last round of tomato canning. I guess it was feared I’d put up all the tomatoes plain and there wouldn’t be any left for salsa. It’s a legitimate concern since I tend to get going one direction and just keep going. Inertia works both ways with me, just as with the rest of the universe. But I digress.

I selected a recipe, Fresh Vegetable Salsa, from Ball’s “Complete Book of Home Preserving,” a more comprehensive canning bible than the classic “Blue Book Guide to Preserving.” After a couple big (for me) sessions of canning tomatoes I’ve gotten pretty good at peeling and cutting up tomatoes so the veg prep went quickly enough. I simmered the salsa per the instructions while I brought the water in the canner up to a boil. I decided while the simmering was happening that I might as well do a batch of tomatillo, too. Getting a canner full of water boiling is an undertaking it seemed sensible to take advantage of an already hot pot. Maybe some day with a little help I can do a real marathon session of different products.

For the tomatillo salsa I wanted to use the same recipe I used last year. It was good and we are just finishing up our last jar. Did I make a note of it? Of course not! My best guess is that it was the Tomatillo Green Salsa from the Wisconsin Safe Food Preservation Series, which I have the printed booklet versions of in its entirety, thankyouverymuch. I did make two changes to the recipe, something that should be done rarely and carefully with canning recipes. Since our jalapenos are so hot I I used green bell pepper instead of the additional long green chilies and I substituted lime juice for lemon juice. I looked around online and it looks like the bottled stuff is pH adjusted the same as lemon is. Unfortunately, the section of frozen lemon and lime juice that I like has gone entirely missing from our grocery store. I was in a hurry so I grabbed a bottle of ReaLime. That may have been a mistake. When I poured it in the salsa I took a whiff. It smelled more like lime candy than actual limes. I was suckered by the label. It says “100% Lime Juice.” What I missed was the “from concentrate with other added ingredients” under that. I think the lime peel oil they jack it up with may be a bit much. We’ll find out when it’s mellowed in the jar for a while and we taste it.

Anyway, the timing worked well enough. While the tomato salsa was processing in the canner I got the tomatillo version simmering. The tomato batch was out of the canner and on the counter with lids popping as I was loading the tomatillo version into the hot water. From beginning to end it took about three hours, including washing all the pots, pans and utensils while the last jars processed.

August Salsa

This has been a good summer for canning. So far I’ve got a batch of our favorite Bread-and-Butter pickles put up, about half the whole tomatoes I’d like to have before winter, and now a couple kinds of salsa. In addition to the additional tomatoes, I want to make the tomatillo salsa again, this time using either just lemon juice or a mix of the good lemon and lime juice if I can find it. We eat a lot of salsa so I may try a different recipe, perhaps one using some of the home-smoked chipotle peppers we’ve get lying around. Now if only the weather would moderate a little from less sauna-like conditions!

Freezing Garlic

I’ve been having some anxiety lately surrounding garlic. More specifically, I’ve started to worry that all the garlic we grew and stored last summer wouldn’t last until we’d used it.

Garlic is a great vegetable. So many of my favorite dishes include it and it stores so easily that it seemed logical that we should grow a substantial quantity of those funky, fragrant bulbs. In the past, we’ve purchased winter farmers’ market garlic that was dry, dusty and frankly moldy so I wasn’t overly optimistic about keeping garlic in Wisconsin through the winter. When I harvested our crop last summer I hung it in baskets in the basement to cure a while before tying it in garlands to hang in the fruit room/root cellar/server closet—it is the Twenty-First Century after all!

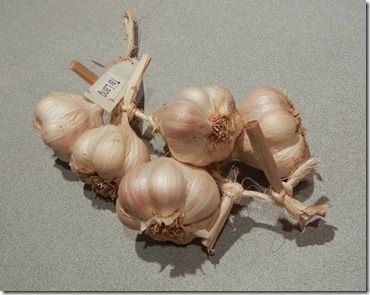
Since that room is visited frequently, I was keeping an eye on the state of the bulbs and have been happy with how they’ve been keeping. Lately, however, I’ve noticed the outer skins on some of the bulbs I’ve brought up to cook with have been more dry and looser. Also, some bulbs are showing sprouting cloves. They’ve got nowhere to grow at this point and are still safe to cook, but I decided that just in case I’d process and freeze some of them. I selected the remaining five bulbs of ‘Tai Lang’ for this project. Incidentally, I’ve found nothing about this cultivar online; Googling it just brings up my own references to growing it. All I know is I bought it at the Westside Community Market and the seller said it was hot.

The first step in processing garlic for freezing is to peel each individual clove. When I’m doing one or two or five for a recipe I just cut off the root end, halve it lengthwise and then flake away the skin with a knife. To peel quantities of garlic I use a faster method. First, separate all the cloves in the bulb and cut off  the root end. Then, lightly crush them with the flat of your knife. Be careful. You’ll end up with a chaotic pile of garlic cloves and papery skins.

Next, get a couple of bowls, preferably stainless steel, that are close to the same size. In a pinch, you can just use a bowl and a plate.  Put your distressed garlic cloves in the bowls and get ready to rumble!

Cover one bowl with the other and sha-a-a-ake vigorously. Listen to the tone and you can actually hear when the cloves have been removed from the skins. It’s pretty cool and I’m sure there’s some big-ass industrial machine out there that uses the same principle to do the same thing. Now you just pick the oh-so-tasty garlic cloves out of the skins and set them aside.

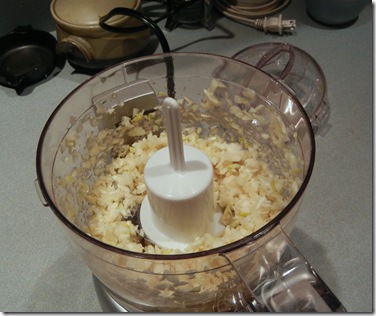
Next, chop the garlic to make it easier to dispense and use. Either coarsely chop it by hand if you have the time and patience. I didn’t so I used a mini food processor. Don’t overdo it. If you want a finer chop later you can always do it then.

The final step is to get some protection on those chopped cloves. Drizzle in a little olive oil and stir it into the chopped garlic. A little goes a long way! The key is to coat the cloves without having them swimming in it. Stir thoroughly so that they’re completely coated. The oil will keep the garlic from turning ugly colors and also make it easier to spoon out the quantity you need when cookin’ time comes around.

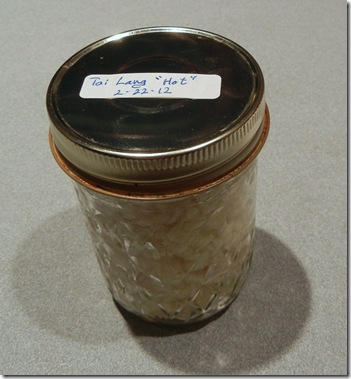
Finally, put the oiled garlic in a jar and screw that lid on tightly. Keep it in the freezer and just scoop out however much you need in your future cooking. You’ll thank yourself for putting in the effort now not only for saving yourself the chopping later, but for also saving some produce that may not have lasted until the next crop comes ready.How do you keep your garlic? I’d be interested in hearing new ideas on growing and storing one of my favorite crops. Comment or email to share your ideas.

This riveting, stem-grinding offering is part of Post Produce, hosted by Daniel Gasteiger over at Your Small Kitchen Garden. Check it out!